 and organized and easy to use. Give this 10 minute DIY easy ribbon organizer a try!)

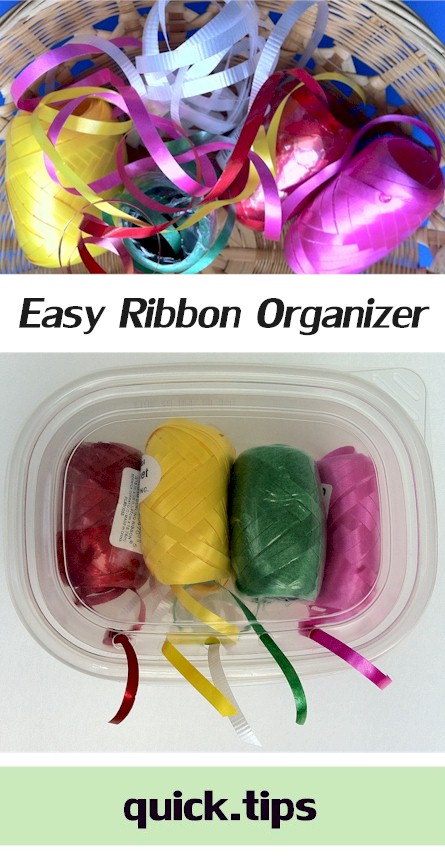
I love to keep supplies on hand for wrapping up a pretty package – I despise having my colorful ribbons tangled into a big knot. With this super quick, easy ribbon organizer that you can be put together in minutes from a recycled plastic container. You’ll find the biggest challenge here will be untangling your ribbon. But once you do if will make wrapping a present so much easier in the future!
What You Will Need
- Hole punch
- Clear plastic container
- Ribbon to organize
Directions for the Ribbon Organizer
Start out with a clean, dry small plastic container. For this DIY, I used a sliced lunch meat container. There is no need to purchase one, just use one that was on its way to the recycling. My preference is the type that has a fairly clear container and clear lid. That way I can see what’s inside without opening the lid.
It’s best to work with a smaller container, one that will hold 5 – 6 rolls of ribbon. When a container is too large, the ribbon will just get jumbled around and that defeats the purpose.
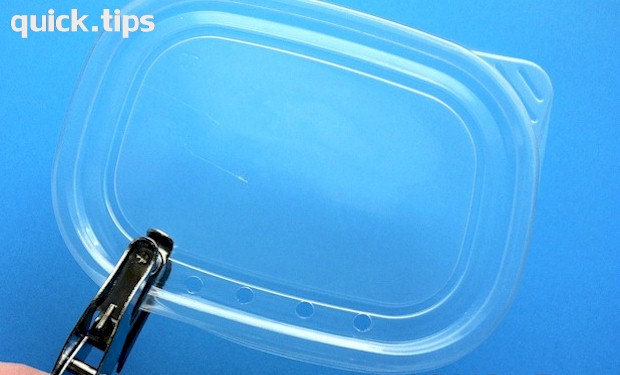
With a hand-held hole punch, punch the holes into the flattest part of the lid that you can reach with the hole punch. This does take a little maneuvering, since you will need to work the hole punch over the lip of the lid.
Start by gathering up your tangled ribbon, re-roll or snip off the straggly ends so that they are in nice neat rolls. Stack the ribbon into the container and thread the end of each ribbon through one of the holes. Once all in place, snap the lid in place. You now have organized, tangle-free ribbon to put back into your gift wrapping station. BTW, this ribbon is perfect for
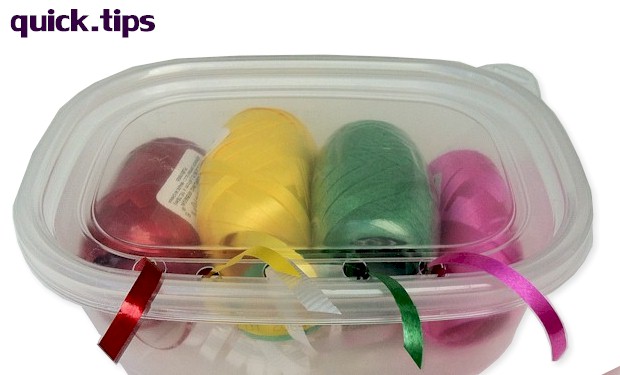
With an organized container, you will easily be able to see what colors of ribbon you have available. Just select the color or colors and easily pull the ribbon out through the top. Now you can learn how to perfectly curl ribbon.
[…] Easy Ribbon Organizer in Only 10 Minutes! […]
Comments are closed.