
Sooner or later, we all have to replace bike handlebar grips. After a few years of use, my handlebar grips started to dry out and crack. Once the foam on my grips started to go, there was just no stopping it. Every time I would take a ride on my bike, I ended up with the old, black, crumbly foam covering my palms.
I thought a creative DIY fix was in order, even though new handlebar grips aren’t overly expensive. To me the solution was pretty simple, the grips look just like pipe foam insulator tubes. So, I figured, why not give it a try. I already had some scraps of the dark gray foam lying around from a few other projects I’ve done with the pipe insulation.
What You Need to Replace Your Bike Handlebar Grips:
- Pipe Insulation Tube that has been pre-slit with the self-sealing edge. You’ll need around 4 – 6 inches for each handlebar grip.
- Scissors or Razor Knife
First use the scissors or razor knife to cut the old foam handlebar grip off the bike. Be careful not to scratch the paint on your bike as it might make it more vulnerable to rust.
Next, use the old grip to measure the section of foam insulator pipe that you will need. Mark the foam tube and then cut it with scissors.
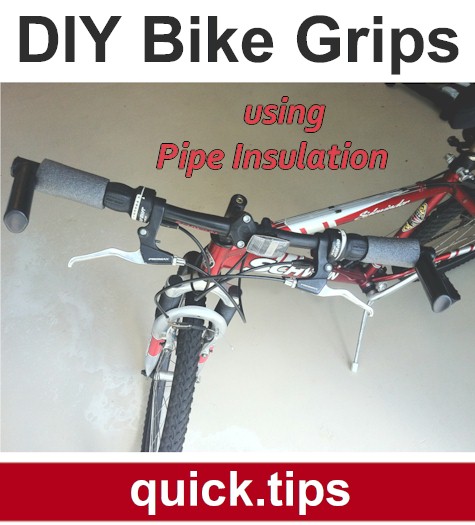
It’s easy to slide the pipe in place, since the foam pipe is already slit on one side. Easy, peasy especially for these handle bars. There is no need to take off the handlebar end pieces. Finally, just follow package instructions for using the self-seal tape on the foam tubing.
This was a quick (5 minute) solution for replacing my bike handlebar grip with an item that I already had in my garage. As I mentioned, usually new bike handlebar grips cost under $15, but, who doesn’t love a really inexpensive and easy DIY? So three you go, another use for Foam Insulator Tubes!