
Since pipes don’t freeze here in Central Florida, I’ve come up with a few other uses for Foam Pipe Covers. One of my favorites creations are these DIY padded hangers. They literally take minutes to make and are so very useful when doing laundry. Put together a half dozen or so while binge watching your favorite Netflix show:)
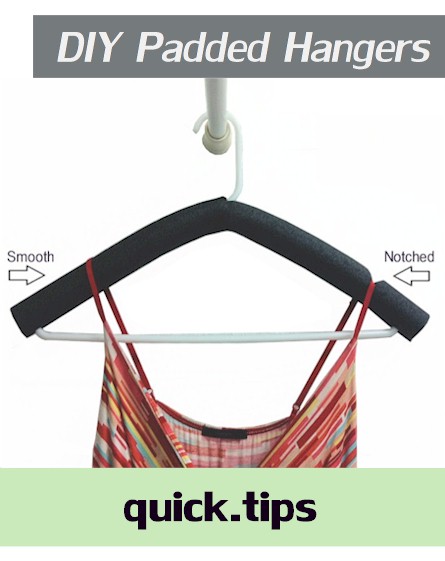
By creating a rounded, padded hanger, you can keep shirts and dresses from getting that dimple on the shoulder that regular hangers create. The foam pipe can also extend past the curve of the hanger for larger items of clothing. Just add a notch into the foam on each side to keep clothes in place and strappy items from slipping off the hanger. Here are a few other options for non-slip hangers.
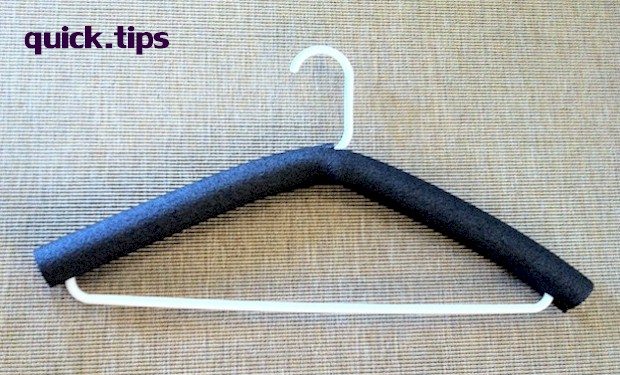
Another benefit is that the foam is durable and holds up quite well. No worries if you like to take damp items out of the dryer and hang them to finish drying. The foam is designed to not break down if it gets wet.
Directions for DIY Padded Hangers:
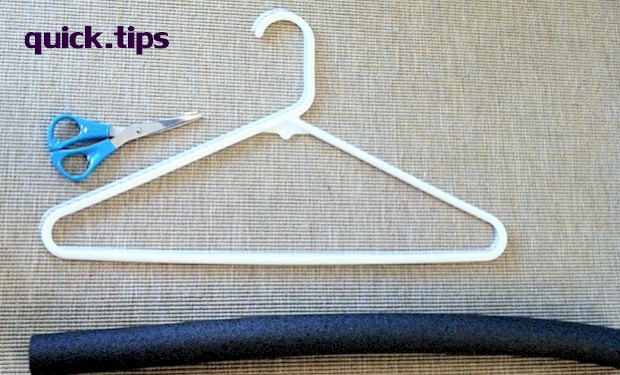
Standard sized plastic hangers work best, though I’m sure thin metal hangers would also work. You will need scissors and about a 20″ section of Insulating Foam Pipe Covers. Measure your hanger from one end to the other – leaving a little extra for overhang as shown. Pipe covers come in lengths anywhere from 3′ to 6′ and usually are 4 per a pack.
The pipe covers have a slit on one side. Measure to the half-way point and make a snip with the scissors into the foam on the un-slit side. This is where you will feed the top, curved part of the hanger through the foam. Gently press the foam (slit side) around the top of the hanger and voilà your padded hanger is complete.
Sure, there are lots of videos on making fancy, fabric covered padded hangers. But I like the simple way these go together to quickly solve the problem for both padded hangers and non-slip hangers all in one.
Extra: If you make a small snip into the foam about 3″ in on each side, your padded hanger can now double as a no-slip hanger for your strappy tops and dresses.